How to Build a Creative Corner for kids at Home (Step by Step Guide)
Table of Contents
How to Build a Creative Corner for Your Child at Home (Step by Step Guide)
A creative corner for kids is one of the most powerful investments you can make in your child’s development — and it costs far less than most parents expect.
The idea is simple. You designate a specific area of your home — a corner of the living room, a section of the bedroom, a small spot in the kitchen — as a dedicated creative space. You stock it with carefully chosen materials. You make it accessible and inviting. And then you step back and let your child use it.
What happens next consistently surprises parents. Children who previously complained of boredom and reached for screens begin spending spontaneous creative time in their corner. Children who said they were not creative begin drawing, building, sculpting, and making. Children who struggled to entertain themselves independently begin doing exactly that.
A creative corner works because it removes all the friction from creative activity. The materials are there. The permission is there. The space is there. All your child needs to do is sit down and begin.
This step by step guide shows you exactly how to build one — for any budget, any home size, and any age.
Why a Dedicated Creative Space Works Better Than Scattered Supplies
Many parents have creative supplies in their home — crayons in a drawer, paper somewhere in a cupboard, playdough in a box in the toy room. But scattered supplies produce far less creative activity than a dedicated organized space. Here is why.
Accessibility triggers use: When creative materials are visible, organized, and immediately accessible children use them spontaneously. When materials are stored away and require adult help to access children simply do not use them as often. The creative impulse is spontaneous — it strikes and passes quickly. Accessible materials catch that impulse. Hidden materials miss it.
Dedicated space signals permission: A specific creative space tells children — this is your place to create, you are free to use everything here, you do not need to ask. This implicit permission is enormously liberating for children who have learned to check with adults before touching art supplies.
Organization enables independence: When supplies are organized clearly children can find what they need, use it, and return it without adult assistance. This independence builds confidence and makes creative sessions sustainable without parental involvement.
A special space creates a ritual: Children who have a creative corner develop a relationship with that space. They return to it regularly not just when directed to but because they want to. The space itself becomes associated with the pleasure of creating.
Step 1 — Choose the Right Location
The location of your creative corner is more important than its size. Here is what to look for:
High traffic area: Choose a location your child passes frequently — the kitchen, the living room, the main hallway. A creative corner tucked away in a spare room will be used far less than one that is visible and accessible in the spaces where family life happens.
Good natural light: Natural light makes creative work more enjoyable and reduces eye strain. Position the creative corner near a window if possible. Good lighting is especially important for detailed activities like coloring and drawing.
Easy to clean surface: Creative activities are messy. Choose a location where spills and mess can be easily cleaned — a tiled or wooden floor rather than carpet, a table with a wipe-clean surface rather than a fabric tablecloth.
Child-height everything: Every element of the creative corner should be at your child’s height. A table they can sit at comfortably with feet flat on the floor, shelves or containers they can reach independently, and a display area at their eye level.
Away from screens: Position the creative corner away from the television and family screens. The visual and auditory pull of nearby screens competes with creative engagement. A corner that is physically separate from screen areas is more effective.
Step 2 — Choose the Right Furniture
You do not need to buy expensive dedicated furniture for a creative corner. Here are options at different budget levels:
Budget option — repurpose what you have: A small table from another room, a kitchen chair cut down to child height, a plastic storage box turned upside down as a seat — repurposing existing furniture costs nothing and works perfectly well.
Mid range option — simple IKEA or similar: The IKEA FLISAT children’s table and MAMMUT chairs are affordable, durable, and perfectly sized for children aged 2 to 8. The TROFAST storage system provides excellent organized storage for creative supplies at a reasonable price.
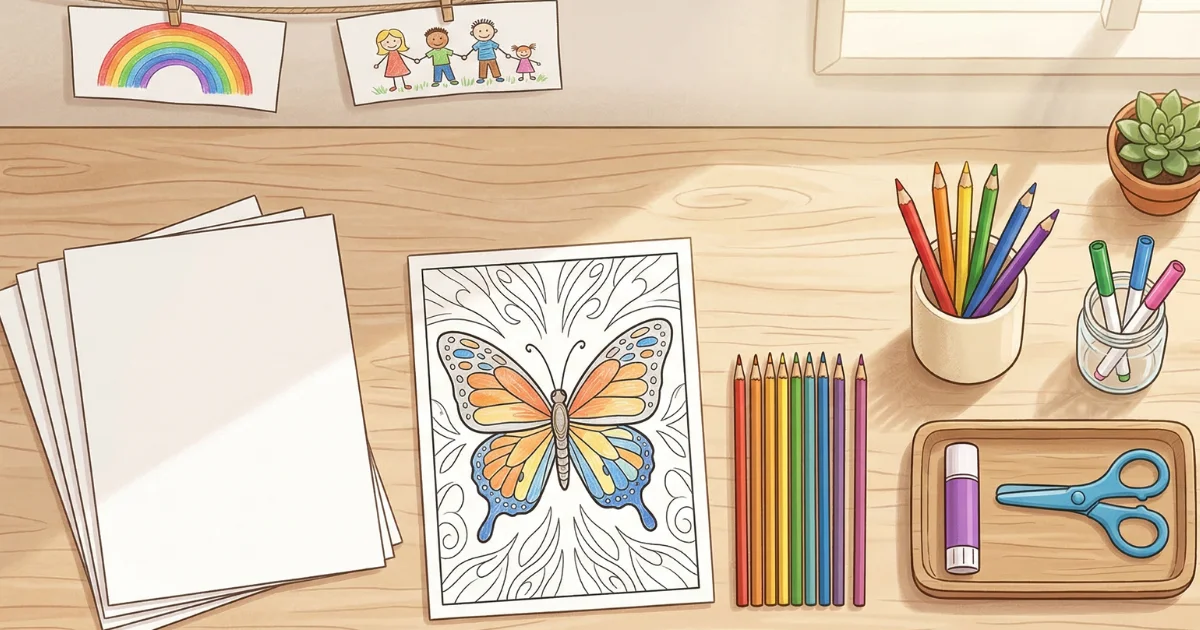
What you genuinely need: A table or flat work surface at the right height for your child. A comfortable seat. Some form of storage for supplies — this can be as simple as a cup for pencils and a tray for paper. A small display area for finished work — even just a strip of wall with a few pieces of tape.
Step 3 — Stock the Creative Corner
The supplies you stock in your creative corner depend on your child’s age and interests. Here is a guide by age group:
For toddlers aged 2 to 4: Keep supplies simple and robust. Jumbo crayons in a sturdy cup, a stack of thick blank paper, a few sheets of simple toddler coloring pages with bold outlines, a small tub of playdough with two or three simple tools, a few large chunky foam stickers. Nothing small, nothing fragile, nothing that requires adult supervision to use safely.
For children aged 5 to 8: Standard colored pencils and crayons, fine tip washable markers, blank paper in multiple sizes, a selection of coloring pages at the right complexity level, child-safe scissors, a glue stick, a small selection of collage materials — fabric scraps, tissue paper, old magazine pages — simple watercolor paints with a brush and a water cup, a small notebook for drawing and writing.
For children aged 9 and up: A wider range of drawing tools — colored pencils, fine liners, gel pens — sketchbooks, more complex coloring pages including mandalas and detailed nature scenes, watercolor or acrylic paints, a craft knife with adult supervision, more complex collage and mixed media materials, origami paper, simple sewing materials.
Essential supplies for all ages: A stack of plain white paper — always have more than you think you need. A selection of coloring pages printed in advance and stored in a simple folder or tray. A display area for finished work. A simple cleanup tool — a small dustpan, a damp cloth, or wipes.
Step 4 — Organize for Independence
The way you organize the creative corner determines how independently your child can use it. Here are the organizing principles that work best:
Everything visible: Store supplies in open containers rather than closed boxes. When children can see their materials they are more likely to use them spontaneously. Clear containers work particularly well.
One type of thing per container: Crayons in one cup. Colored pencils in another. Scissors in a dedicated holder. Glue sticks in a small tray. This simple organization means children can find what they need immediately and return it to the right place afterward.
Paper at child height: Store paper in a tray or holder at your child’s level. Nothing discourages creative activity faster than having to ask an adult for paper every time.
Coloring pages in a dedicated folder: Keep a folder or tray of pre-printed coloring pages in the creative corner at all times. Rotate the pages regularly — replace used pages with fresh ones and introduce new themes to maintain variety and excitement. This is one of the most practical things you can do to maintain creative corner engagement over time.
A designated display area: Hang a small section of wall beside the creative corner as a display area. Use simple tape, a string with clothespins, or a small corkboard. Make a rule — every finished piece goes on display. When the display is full the oldest piece moves to a portfolio folder to make room for new work.
Step 5 — Set the Rules
A creative corner works best with a small number of clear simple rules that give children freedom within sensible boundaries.
Rule 1 — Everything in the corner is yours to use freely: Children do not need to ask permission to use any material in the creative corner. This is the most important rule because it removes the friction of seeking adult approval before beginning creative work.
Rule 2 — Put things back where they belong: After each creative session supplies go back in their containers. This simple habit keeps the corner organized and ensures materials are always ready for the next spontaneous creative session.
Rule 3 — Finished work goes on display: Every completed piece — however it looks — goes on the display area. This rule communicates that all creative effort has value and gives children a tangible reward for completing their work.
Rule 4 — Mess stays in the corner: Creative mess is completely acceptable within the creative corner area. Outside the corner — on the walls, on other furniture, on siblings — is not. A vinyl tablecloth under the table catches drips and spills and makes cleanup easy.
Step 6 — Introduce the Corner Thoughtfully
How you introduce the creative corner to your child matters enormously. Here are the steps that work best:
Set it up while your child is not watching: The surprise of discovering a fully stocked creative space creates excitement and enthusiasm that a gradual setup does not. Set it up during nap time, after bedtime, or while your child is at school.
Let them discover it: Rather than making a formal announcement simply let your child discover the corner naturally. When they find it and ask about it tell them — this is your creative corner, everything here is yours to use freely whenever you want.
Do not over-explain the rules: Share the simple rules once, briefly and positively. Then step back. Let your child explore the space and the materials on their own terms.
Sit beside them for the first session: For the first creative corner session sit nearby — not directing or helping, just present. Your calm nearby presence during the first session helps your child settle into the space and signals that this is a safe, supported activity.
Refresh regularly: The creative corner needs regular refreshing to maintain enthusiasm. Add new coloring pages weekly. Introduce a new material every few weeks — a new type of paper, a new craft tool, a different medium. These small additions keep the corner feeling exciting and worth returning to.
Creative Corner Ideas for Small Homes
If your home is small do not worry — a creative corner does not need to be a dedicated room or even a large area. Here are creative solutions for small spaces:
The creative tray: A large shallow tray stocked with supplies that lives on a shelf and can be pulled out and placed on any flat surface when needed. When creative time is over the tray goes back on the shelf. Small footprint, full functionality.
The back of a door: An over-door organizer with pockets can hold paper, coloring pages, pencils, and small supplies. The door becomes the creative corner — fold-out, put-away-able, and taking up zero floor space.
The creative cart: A simple rolling cart — widely available and inexpensive — stocked with creative supplies that can be rolled to any location in the home. The cart becomes the creative corner and travels wherever your child wants to create.
The window seat corner: If you have a window seat or bay window area a simple cushion and a small rolling cart or tray beside it creates a cozy creative nook that children find particularly inviting.
Maintaining the Creative Corner Over Time
The creative corner works best as a long term feature of your home rather than a temporary experiment. Here is how to maintain its effectiveness over time:
Refresh the coloring pages weekly: This single habit makes the biggest difference to sustained creative corner engagement. New pages create new excitement. Old pages that have been available for weeks lose their appeal. Print a fresh selection every week and rotate them into the folder.
Introduce new materials gradually: Do not stock everything at once. Introduce new materials gradually — a new type of marker, a new craft activity, a new coloring theme — to maintain a sense of discovery and novelty over time.
Follow your child’s evolving interests: As your child grows their interests change. A creative corner stocked with toddler supplies will not engage a 7-year-old. Regularly reassess the supplies and upgrade them to match your child’s current developmental level and creative interests.
Display work consistently: Never let the display area go empty or stop refreshing it. A display area that is consistently maintained sends a consistent message — your creative work matters and deserves to be seen.
Frequently Asked Questions
How much does it cost to set up a creative corner? A basic creative corner can be set up for very little cost — as little as the price of a pack of paper, a set of crayons, and some printed coloring pages. A more fully stocked corner with a dedicated table and organized storage might cost between 50 and 150 dollars depending on what furniture you already have. The investment pays dividends in hours of independent screen-free creative engagement.
What age is a creative corner suitable for? Creative corners work for children from around 18 months through to the teenage years. The supplies change significantly across this age range but the principle — a dedicated, accessible, organized creative space — works at every developmental stage.
My child uses the creative corner for five minutes and then wants to do something else — is that normal? Completely normal, especially in the early weeks. Children who are new to self-directed creative activity often have short creative sessions initially. The sessions lengthen naturally over time as the habit and the capacity for sustained creative engagement develop. Do not judge the success of the creative corner by session length — judge it by whether your child returns to it regularly.
Should I put a tablet or device in the creative corner? No. The creative corner is explicitly a screen-free space. The presence of a device — even one loaded with creative apps — changes the nature of the space and competes with the open-ended creative engagement that makes the corner valuable.
How do I handle it when my child makes a mess that goes beyond the corner? Calmly redirect — the mess stays in the corner, let us clean this up together and then you can keep creating. Do not make a big issue of it. Simply maintain the boundary consistently and gently. Most children adjust quickly when the rule is clear and consistently applied.
— Lina, Daily Coloring Pages